The magnet is controlled through the !LabView interface IPSFrontPanel.vi. For notes on operating the 240 GHz spectrometer, see the [[240 GHz EPR Spectrometer Manual]]
Main Coil
| Central magnetic flux density at 4.2 K | 12.5 Tesla |
| Homogeneity (over 10 mm diameter spherical volume) | 5 parts in 106 |
| Current decay in persistent mode | 1 part in 105 per hour |
Sweep Coil
| Flux density magnitude | ±0.06 Tesla |
| Homogeneity over 10 mm diameter spherical volume | 0.015% |
| Magnet clear bore diameter | 112 mm |
Technical Drawings of 12.5 Tesla magnet and Janis cryostat
Safety
Presence of the magnet is indicated by a flashing red light outside of room 1390A. If this indicator is not flashing, the magnet may have quenched – proceed with caution.
No magnetic materials should be placed near or within the magnet. Keep electronics and credit cards outside of the stray field of the magnet (~3 Gauss at 1.25 m from center).
Running the sweep coil
Check that the position of the main field is suitable by pressing MAGNET STATUS. The sweep coil may be moved ±0.06T about the position of the main field.
The main coil should be in persistent mode before running the sweep coil. Change the PS Selector to IPS120-20 sweep. Under SETTINGS, select the desired target field and sweep rate. The maximum sweep rate for the sweep coil is 0.05 mT/sec. Press GO TO SET.
Running the main coil
Caution: Sweeping the main field burns off significantly more helium and nitrogen in the magnet than using the sweep coil. Ensure there is plenty helium and nitrogen in the magnet before beginning.
Taking the magnet out of persistent mode
Ensure the sweep coil is at zero field and is unclamped. Take off the non-return valve on the helium reservior exhaust. Change the PS Selector to IPS120-20 main.
Unclamp the main field (this will make a loud click). Click MAGNET STATUS. The current leads will be swept quickly to the current Set Point value.
Turn the switch heater ‘on’ by pressing the HEATER ON button. The switch heater will light up when you release the button and a 90 second countdown will start during which the current will ramp up. Wait for a bit to settle; the voltage should be low and the current ~80A.
Running the magnet to a new set point
Under SETTINGS, select the desired target field and sweep rate. The main coil is generally swept at 0.1 – 0.2 T/min (maximum sweep rate is 0.25 T/min). Press GO TO SET. When the magnet has reached the new set point and the voltage has stabilized click HOLD. You can now return to persistent mode.
Establishing persistent mode
Turn off the switch heater by pressing the HEATER ON button again. A 90 second countdown will start during which the current will ramp down. When the current and voltage have stabilized, clamp the main field (this will make a loud click).
Replace the non-return valve on the helium reservior exhaust. Wait ~15 minutes for the field to stabilize before running the sweep coil.
Sweeping the main coil during CW-EPR experiments
Move the sweep coil to zero field, take the magnet out of persistent mode, and move main field to desired starting point. Use the T SWEEP tab in Sweep.vi with Time Step set to 200ms.
Under CONFIGURE DEVICES, change #2 from Field (Sweep-coil) to Field (main-coil). The rest of the devices should be configured as usual for a CW-EPR experiment.
Sweep.vi is not currently able to sweep the main field automatically. To run an experiment, click Start in Sweep.vi so it begins recording data. Then in IPSFrontPanel.vi under SETTINGS select desired target field and sweep rate. Click GO TO SET. When the scan is finished, you must manually stop data collection by pressing STOP in Sweep.vi.
When finished, return main field to 8.60 Tesla and put in persistent mode.
General Maintenance
The magnet will only function properly providing that all of the conductors remain in the superconducting state, i.e. they must remain submerged in liquid helium. The thermal shock of a quench could easily damage the brittle Nb3Sn coils. As such, the liquid helium jacket of the magnet must be periodically filled. Boil off of the cryostat is minimised by the presence of a liquid nitrogen jacket and an outer vacuum chamber, which also require periodic filling and evacuation.
A Google Docs spreadsheet documenting the OVC vacuum pressure, liquid helium level, and liquid nitrogen level over time is found here:
[https://docs.google.com/spreadsheets/d/1IqhX5QJ8uuQPdHxMaHb5Exz9YzxaAFiz_cDtUZOQ1Vs/edit?usp=sharing Main OVC and cryogen record]
Cryomech reliquifier operation
In October 2024, a helium reliquifier was installed that makes the superconducting system (almost) closed cycle. The recovery is >90%.
Start-up
Before inserting the fill needle into the magnet, ensure that dry helium is flowing through the system (see below on dry helium over-pressurizing). This is to prevent air freezing on the condenser inside the cold head and blocking flow. If there is frozen air/water on the cold head, the pulse tube temperature will read below 4.2 K when the system is operating. If there is only helium in the system, the temperature will pulse right around 4.2 K as helium is being liquified. To insert the needle, lower the winch on the back of the gantry and guide the needle into the fill port. This is a two person job. If the needle needs to be removed, it is best to reduce the operating pressure of the system down to 0.1 or 0.25 psig before doing so to reduce the amount of pressurized gaseous helium that escapes (see below about HRC-110).
Ice in the pulse tube
In case the system does get air in it and freezes in the pulse tube:
1. Turn off the compressor
2. Remove the needle with the winch
3. Allow the system to warm overnight
4. Lower it back in while over-pressurizing He (ideally on both sides of the connection).
Frozen vacuum jacket
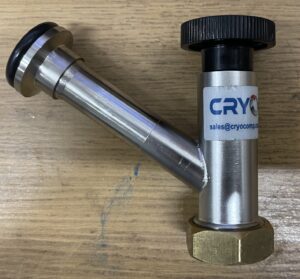
In case the liquifier jacket starts condensing air, the vacuum jacket has been compromised. It probably just needs to be pumped out again. Cryomech provides a special part for this (see photo below). This part connects to the opening on the bottom edge of the jacket and adapts to a KF flange. This part is tightened down by an o-ring and hex nut. Begin by pumping down the line connecting to this adapter. Once the lines have been evacuated, turn the thumbscrew into the valve on the jacket. This grabs the sealing valve. Then, pull out the valve by tugging on the thumbscrew. Wedge something in so that the thumbscrew cannot be pulled back in by the vacuum. You are now pumping the jacket. Allow the rough to go down to 0.5e-2 Torr and then activate the turbo. Let this run overnight. If the vacuum gets down to 10^-6 Torr, you are good to go. Now, push the thumbscrew back in. Once it is in, break the vacuum on the outside (ensure the turbo and rough pump are off!!). This will ensure the valve stays in place as a result of the external pressure. Now, unscrew the thumbscrew until you are sure it is all the way out. Now unscrew a lot more. You are safe to unscrew the o-ring holding it in place and can remove the adapter.
Heater operation
Helium gas boils off from the magnet jacket, flows through the vapor return line, is liquified, and falls back into the jacket due to gravity. To ensure that the whole system remains under positive pressure (and that way no air can leak in), there is a heater inside the cold head that is controlled by the HRC-110 heater controller. This heater can be used to set the pressure set point for the whole system (currently 0.75 psig). If the boiloff rate of the cryostat is not high enough to maintain this overpressure, the heater ensures the system does not go below atmospheric pressure. There is also a needle valve on the helium vapor return line that controls the rate that gas makes it to the cold head; it should be opened exactly 2 full turns
Starting the system
The system can be started with either the front panel control on the compressor (in the FEL vault, follow the 2″ diameter metal hoses) or the software front panel on the EPR computer. The computer communicates with the compressor via ethernet through the ITST network.
After starting the system, you should hear the compressor motor turn on and the pulse tube begin pulsing (repetitive chirps, roughly 1 per second). The temperature should begin dropping. It will stabilize at 4.2 K. If this does not happen, get help or consult the operating manual for the Cryomech system (manual located on Sherwin shared drive under /Manuals/).
Monitoring
The helium level, system pressure, and heater output can be monitored at magnet-log.onrender.com. The code for the operating this site is here in case it ever goes down or Render becomes a paid service. Also this code is not good, hopefully someone takes the time to improve (re-write) it.
Slow filling
Context: Recovery using the new reliquification system is currently ~90%, so it is necessary to inject He into the system roughly once per month. A cylinder of UHP300 He from Airgas is sufficient for this purpose. Set up the cylinder in the back of the EPR lab and connect it to the He line.
Pumping Down
- Make sure all valves up to the He cylinder are closed. They should have been shut off at the end of the last fill, but verify before proceeding. This includes:
- Two “Edward Speedivalve” valves on rough pump → red color on threading should not be visible.
- Blue valve on wall next to second “Speedivalve”.
- Black knob on wall near rough pump labeled “Hoke”.
- In the back by the He cylinder the knob on the white line and the knob before the regulator connected to the He cylinder.
- Lastly, make sure the blue valve nearest the magnet He port is shut off.
- Two “Edward Speedivalve” valves on rough pump → red color on threading should not be visible.
- Do not take action yet, but the goal is to open all valves except the ones directly out of the cylinder and directly into the magnet and to use the KF flange manifold on the wall near the magnet to pump down the lines to ~0.1 Torr. Note we will not be able to generate a great vacuum, but it will be good enough for our purposes. The idea is to ensure there is very little air inside the lines when helium starts flowing into the magnet system to reduce the risk of air rocks forming in the cryostat
- Turn on the pump by switching the extension cord on. Do not press any other buttons on the pump.
- Open the Speedivalve nearest the pump. Observe the pressure increase to atmospheric pressure and wait until it begins to decrease, then open the second Speedivalve and observe the same.
- Now open the blue valve on the wall next to the second Speedivalve. This will start pumping the copper lines involved in He transport up to the He port to the magnet and the He safety valve to Young Lab. Again, observe the pressure reading increase and wait for it to begin decreasing again.
- Lastly, we must also pump the green rubber gas line from the He cylinder. On the wall near the pump open the black knob labeled “Hoke” but DO NOT touch the regulator. Go to the He cylinder in the back room. Open the black knob on the WHITE transfer line and twist open the knob BEFORE the cylinder regulator. DO NOT touch the cylinder regulator and DO NOT start the flow of He by twisting the knob on top of the cylinder.
- Check the HRC-110 controller and make sure the magnet pressure is staying stable. Wait several hours to pump down. You may leave the EPR lab during this time. Ideally, the pressure should read 1.4e-1 torr when done.
Starting Slow Fill
- Close the Speedivalves going to the pump and turn off the pump.
- Quickly start the flow of Helium (valve is on top of cylinder). The cylinder regulator states the fill level on the right. Make sure you have a plan in place to turn off the flow BEFORE the gas runs out. Notice also that the zero for the flow rate (on the left) is displaced, though the approximate position is marked with a Sharpie.
- On the He gas line regulator near the pump, make sure the reading is set to around 2.5 psi. Avoid exceeding 3 psi. The danger level for the magnet is 5 psi.
- Open the blue valve near the He port to the magnet. He should now start slow-filling into the magnet.
- Check the pressure on the HRC-110 controller. Stay around long enough to make sure it stabilizes near the value set by the He gas line regulator.
- Notice also the He fill level on the display near the door. This value may go down significantly (up to ~10%) during the slow fill. The cause of this is liquid in the He sleeve of the magnet being pushed towards the bottom of the magnet due to the incoming pressure, and the resistance of the superconducting wire we use to measure fill depends on pressure. Do not be too concerned about the reading, but do keep an eye on it. The reading updates once every hour.
Before the cylinder is empty, close the valves so that air does not enter the system. Close the valve closest to the magnet, then close the He cylinder, and then close all valves. Try to ensure all valves are closed for the next fill.
Evacuating the OVC
The outer vacuum chamber of the magnet must be evacuated periodically to maintain good vacuum. It is good to do this at least every two weeks, and before any experiment where the cryostat will be cooled below 10 K to ensure good temperature stability. This procedure should run overnight and does not need to be monitored.
The OVC should be evacuated with a turbomolecular pump backed by a roughing pump; the Sherwin lab has several which are suitable for this purpose.
The oil-free pump on the blue cart is preferred. If using the pump on the silver cart, first attach the oil trap to the exhaust venting out of the room.
Attach the hose of the pump to OVC port on the top of the magnet. Turn on the roughing pump and wait until pressure reading on front of the cart drops to ~ 10-2 Torr. Open the black and red valve on the turbo cart and again wait for hose to drop in pressure. Then open black ball knob on the magnet.
Run with roughing pump only until pressure drops to ~5 x 10⁻² Torr. This is essential to not damage the turbo pump.
Turn on the turbo pump (leave the roughing pump on). A light will come on indicating that the pump is ‘Accelerating.’ When at speed, this will switch to ‘Normal Operation.’
Allow pump to run overnight.
When finished, check pressure by pressing IG1. The filament should turn on in a couple minutes and the pressure should be ~ 3 x 10⁻⁶ Torr. Lower pressure is great, but a bit higher isn’t problematic. Press IG1 again to turn the filament off.
Close the black ball valve on the magnet end, followed by the black and red valve on the pump cart.
Press the OFF button to turn off the turbo pump. Allow the turbo a few minutes to spin down.
Disconnect the pumping line from the magnet side and cap the OVC port with a blank.
Turn off the roughing pump.
Filling the nitrogen jacket
The nitrogen jacket should be filled before the level drops below 20%. The magnet burns off ~5 %/day of nitrogen when the main coil is in persistent mode. It takes ~150 L to fill the jacket when the nitrogen level is at 20%. This procedure generally takes ~60 minutes and should be monitored continuously.
Move the bridge back as far as possible – it is best not to freeze the quasioptics.
Attach rubber hose to liquid port of nitrogen dewar. Insert nitrogen transfer line into hose and clamp down; the transfer line should extent several inches into the rubber hose so that this connection remains stable under pressure.
Plug the nitrogen relief hose under the back of the magnet. Open the two ports on top of the magnet which lead to the nitrogen jacket. You will fill through the right-hand port and vent through the left-hand port.
While holding onto the transfer line, open the liquid port of the nitrogen dewar slightly. Allow line to purge and establish good flow. Insert transfer line into fill port on magnet and open liquid line of dewar fully. You should see nitrogen pluming from the left-hand port on the magnet.
Allow to fill until nitrogen level reaches 100%. Level may be monitored on the magnet power supply tower or through the !LabView software.
When finished, fully close the knob on the nitrogen dewar for the liquid port. Remove transfer line from the cryostat.
Replace caps on two ports on top of the magnet. Remove plug from relief hose under the back of the magnet.
Filling the helium jacket
The helium jacket should be filled before the level drops below 77%, never let it drop below 75%. If the level drops below 68% while the magnet is energised it will quench. The magnet burns off ~1.5 %/day of helium when the main coil is in persistent mode.It takes ~60 L to fill the jacket when the helium level is at 77%. This procedure generally takes ~45 minutes and should be monitored continuously. If using left-over helium to fill, it is generally worthwhile if you have >5 L.
Move the bridge back as far as possible – it is best not to freeze the quasioptics.
Set up the transfer line: On the dewar end, slide the metal piece and O-ring assembly near the end of the leg. The O-ring and knurled nut on the magnet side should be at the black tape.
Remove the non-return valve from the exhaust port of the helium reservoir. Loosely plug the exhaust port with paper towel to prevent contamination from air. Unscrew the fittings (O-ring and knurled nut) from the magnet’s transfer tube entry port. Don’t loose the O-ring! Put the bung loosely in the transfer tube entry port on the magnet to prevent gross contamination with air.
Close the 1 psi valve on the helium dewar. Slowly insert transfer line into dewar. When you reach the level of the liquid you will start hearing oscillations in the tube, gradually increasing in frequency and intensity. When these stop you should see a white vapor and when liquid starts to emerge you may see a white cone plume. Insert the leg of the transfer line into the transfer tube entry port on the magnet. Lower the dewar leg to just above the bottom of the dewar (helium dewars tend to be dirty and having the transfer line sit on the bottom may clog the transfer line). Helium will vent from the exhaust port as it fills.
Pressurize the dewar: Turn on helium gas from the cylinder in the back of the room (2 knobs + black line). Slightly open the knob on the green line near the magnet – you should feel helium blowing out. Screw on necessary fittings to open port of helium dewar and open port slightly to vent. Then insert green line and open port fully. Adjust helium flow until pressure in dewar is ~3 psi. If pressure rises above 6 psi, lower gaseous helium flow and vent through 1 psi blow-off valve.
On the helium level meter, change readout from slow to fast. Helium level may be monitored here or with !LabView software as it fills. The fill is finished when the helium level reaches 100%. If you started with a partial tank of helium, the end of the fill is indicated by the helium level either not changing or going down and will be accompanied by a high-pitched ‘whistling’ sound.
When the liquid helium reservoir has been filled, stop the transfer by closing off the helium gas line and the corresponding port on dewar. Release the pressure in the helium dewar by venting through the 1 psi valve. Unscrew both ends of transfer line and remove legs from dewar and magnet simultaneously.
Replace O-ring, nut, and bung on the magnet’s transfer tube entry port. Replace non-return valve from the exhaust port of the helium reservoir. This may require further tightening after the fitting warms up. Turn off gaseous helium cylinder in reverse order.
On the helium level meter, change readout from fast to slow.
— %USERSIG{JessicaClayton – 2014-09-16}%
Comments
%COMMENT%